I changed the spec for R20 from 125 Ohms to 150 Ohms. I recommend an 8W minimum Brown Devil here.
The Fullerwell
Moderators: zaphod_phil, Daviedawg, Graydon, CurtissRobin, colossal
-
crgfrench

- Frequent poster

- Posts: 827
- Joined: Fri 04/27/18 3:02 am
Re: The Fullerwell
0 x
-
crgfrench
- Frequent poster
- Posts: 827
- Joined: Fri 04/27/18 3:02 am
Re: The Fullerwell
Finally broke out the old Hakko and populated the Turretboard today. It's amazing what you can get done when 2 of your jobs shut down and the third one has you working from home. Still need to order a few resistors I didn't have on my bench but other than that it's pretty much complete.
You do not have the required permissions to view the files attached to this post.
3 x
-
zaphod_phil
- Builder, Admin

- Posts: 15208
- Joined: Wed 03/19/03 2:00 am
- Location: YYZ
-
crgfrench
- Frequent poster
- Posts: 827
- Joined: Fri 04/27/18 3:02 am
Re: The Fullerwell
Fullerwell 18 Watt Amplifier #1 on a 2"x6" prototyping board (2018) [white board]
Fullerwell 18 Watt Amplifier #2 on a 3"x7" commercial PCB (2019) [green board]
Fullerwell 18 Watt Amplifier #3 on a 3"x9"
custom turretboard (2020) [black board] Planned #4 on a Wattkins Universal PCB
Planned #5 on an eyelet board
Planned #6 PTP using tag strips
custom turretboard (2020) [black board] Planned #4 on a Wattkins Universal PCB
Planned #5 on an eyelet board
Planned #6 PTP using tag strips
You do not have the required permissions to view the files attached to this post.
1 x
-
crgfrench
- Frequent poster
- Posts: 827
- Joined: Fri 04/27/18 3:02 am
Re: The Fullerwell
More turretboard progress.
1) completed the tube-side wiring, installed in the style of Danny Russell, i.e. all wiring comes up from underneath the board on the inside of the turrets. I love this construction method -- more work but gives the board a beautiful clean appearance.
2) swapped the positions of the American and British cathode bypass caps & resistors for the first Mullard CV4004 preamp tube (at the far right end of the board). This allows for perfect alignment with the cathode pins on the V1 socket (pins 3 and 8 ).
3) reinstalled all 6 film/foil coupling caps so that their outer foil ends are on the low-impenance side of the circuit. When I first soldered these I must have had a brain cramp; I originally installed them [pointing up] with the outer foil ends were pointed towards the preamp ground bus, mistakenly thinking "that's the low side" ...but of course coupling caps don't connect to the ground bus! They connect to the plate of the prior stage, which in this case is [pointing down] towards the tube sockets. The circuit will work fine either way, it just has slightly better shielding now, to reduce excess noise.
4) modified filter caps ground bus connection. Hard to see in these images because I used black cloth push-back solid wire, but originally I had only the first filter cap connected to the power amp ground bus and the second two connected to the preamp ground bus, like in the 1957 Fender Tweed Deluxe layout. I changed that so only the third filter cap is on the preamp ground bus; to reduce hum.
You do not have the required permissions to view the files attached to this post.
1 x
-
crgfrench
- Frequent poster
- Posts: 827
- Joined: Fri 04/27/18 3:02 am
Re: The Fullerwell
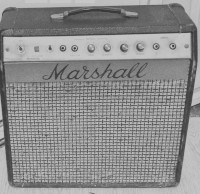
With a bit of drilling, a 5E3 chassis accommodates a Marshall 18W power tranny (Classictone 40-8035) and a Merren reproduction of a Drake #784-103 output tranny. And it all fits right into a standard 1x12 Tweed Deluxe cabinet. Barely.
You do not have the required permissions to view the files attached to this post.
1 x
-
crgfrench
- Frequent poster
- Posts: 827
- Joined: Fri 04/27/18 3:02 am
Re: The Fullerwell
This gives it a better weight distribution.
Is there any reason to NOT locate the OT right over the inputs?
Is there any reason to NOT locate the OT right over the inputs?
You do not have the required permissions to view the files attached to this post.
0 x
-
crgfrench
- Frequent poster
- Posts: 827
- Joined: Fri 04/27/18 3:02 am
Re: The Fullerwell
This is how to build a Lite 2b on the Fullerwell turretboard. This board has an extra set of turrets on the right if you want to remove the V1 cathode jumper and have 2 channels with different voicings.
You do not have the required permissions to view the files attached to this post.
Last edited by crgfrench on Fri 04/03/20 9:55 am, edited 4 times in total.
0 x
-
colossal

- Moderator

- Posts: 450
- Joined: Thu 05/10/07 2:00 am
- Location: Moving through Kashmir
Re: The Fullerwell
I think that is a better plan, all around. With the previous arrangement, you would probably get some hum induction because of how close the PT and OT were to one another.
2 x
-
crgfrench
- Frequent poster
- Posts: 827
- Joined: Fri 04/27/18 3:02 am
-
zaphod_phil
- Builder, Admin
- Posts: 15208
- Joined: Wed 03/19/03 2:00 am
- Location: YYZ
Re: The Fullerwell
You might get squeal.To help reduce the chance of that happening, twist the three OT primary connection wires tightly together,almost like they're heater wiring.
2 x
Nature abhors a clean tube amp
-
JMPGuitars

- Super Duper Admin

- Posts: 3969
- Joined: Tue 09/18/12 8:00 pm
- Location: South Central, MA
- Contact:
Re: The Fullerwell
+1 for this. I like to add heat shrink tubing over the twisted wires to reduce the chance of any wires shifting, and protect them at the same time.zaphod_phil wrote: ↑Fri 04/03/20 4:41 pmYou might get squeal.To help reduce the chance of that happening, twist the three OT primary connection wires tightly together,almost like they're heater wiring.
1 x
'I installed a skylight in my apartment yesterday... The people who live above me are furious.' - Steven Wright
Modern Ground Schemes
Soldering Technique
B+ Voltage Reduction
Amplifier Tools & Parts Info
Web Design: DolceVittoria.com
Guitars / Amps / Effects: JMPGuitars.com
(anti)Social: Facebook · Instagram
Items for Sale
Modern Ground Schemes
Soldering Technique
B+ Voltage Reduction
Amplifier Tools & Parts Info
Web Design: DolceVittoria.com
Guitars / Amps / Effects: JMPGuitars.com
(anti)Social: Facebook · Instagram
Items for Sale
-
crgfrench
- Frequent poster
- Posts: 827
- Joined: Fri 04/27/18 3:02 am
Re: The Fullerwell
Thanks guys, I will do just that. Also I'm going to leave the OT leads on the outside of the chassis until they reach the original grommets. Cant see them there anyway in this Tweed Deluxe combo cabinet.
0 x
-
crgfrench
- Frequent poster
- Posts: 827
- Joined: Fri 04/27/18 3:02 am
Re: The Fullerwell
Quick summary of how to build 3 circuits on this turretboard:
https://youtu.be/RsKN2cn9ck4
https://youtu.be/RsKN2cn9ck4
0 x
-
zaphod_phil
- Builder, Admin
- Posts: 15208
- Joined: Wed 03/19/03 2:00 am
- Location: YYZ
Re: The Fullerwell
Is “Fullerwell” the name of an amp design or the circuit board(s) you’re using?
0 x
Nature abhors a clean tube amp
-
lavrgs
- The MAN
- Posts: 125
- Joined: Wed 03/09/16 10:07 pm
- Location: Oregon
Re: The Fullerwell
From earlier in the threadzaphod_phil wrote: ↑Sat 04/11/20 8:18 pmIs “Fullerwell” the name of an amp design or the circuit board(s) you’re using?
I really liked seeing the process of going from breadboard to turret board. Nice Work!!!
1 x
-
zaphod_phil
- Builder, Admin
- Posts: 15208
- Joined: Wed 03/19/03 2:00 am
- Location: YYZ
Re: The Fullerwell
Interesting! I used to live near Hanwell some years ago. I would buy my guitar stuff from a music store next door to what was previously Jim Marshall's music shop (now a barber shop).
1 x
Nature abhors a clean tube amp
-
crgfrench
- Frequent poster
- Posts: 827
- Joined: Fri 04/27/18 3:02 am
Re: The Fullerwell
Amp design.zaphod_phil wrote: ↑Sat 04/11/20 8:18 pmIs “Fullerwell” the name of an amp design or the circuit board(s) you’re using?
"Fuller" from Fullerton California
Plus:
"well" from Hanwell, London.
It's a split-channel 5E3 preamp (with cathodyne PI)
Plus:
the 18W output section from a model 1974 baby bluesbreaker.
Uses 18W iron;
Can be built with an EZ81 rectifier or diodes.
0 x
-
crgfrench
- Frequent poster
- Posts: 827
- Joined: Fri 04/27/18 3:02 am
Re: The Fullerwell
Wow! That is some real history there -- I hope to go there someday, just to breathe in the fine air on Uxbridge Road. That must've been a wonderful place to grow up.zaphod_phil wrote: ↑Sun 04/12/20 12:39 pmInteresting! I used to live near Hanwell some years ago. I would buy my guitar stuff from a music store next door to what was previously Jim Marshall's music shop (now a barber shop).
0 x
-
crgfrench
- Frequent poster
- Posts: 827
- Joined: Fri 04/27/18 3:02 am
Re: The Fullerwell
Revised the Breadboard layout for the Fullerwell, Basic version uses less expensive components that would cost $36 (plus the board and wire); Premium version would cost $201 (plus board & wire). I have a new permaproto board shipping from Adafruit, am planning to build something in between Basic and Premium. This revision lays out the components similar to a traditional turretboard layout for an 18W or a 5E3.
You do not have the required permissions to view the files attached to this post.
0 x